
Golf Simulator Enclosure Packages Explained for Home Setups
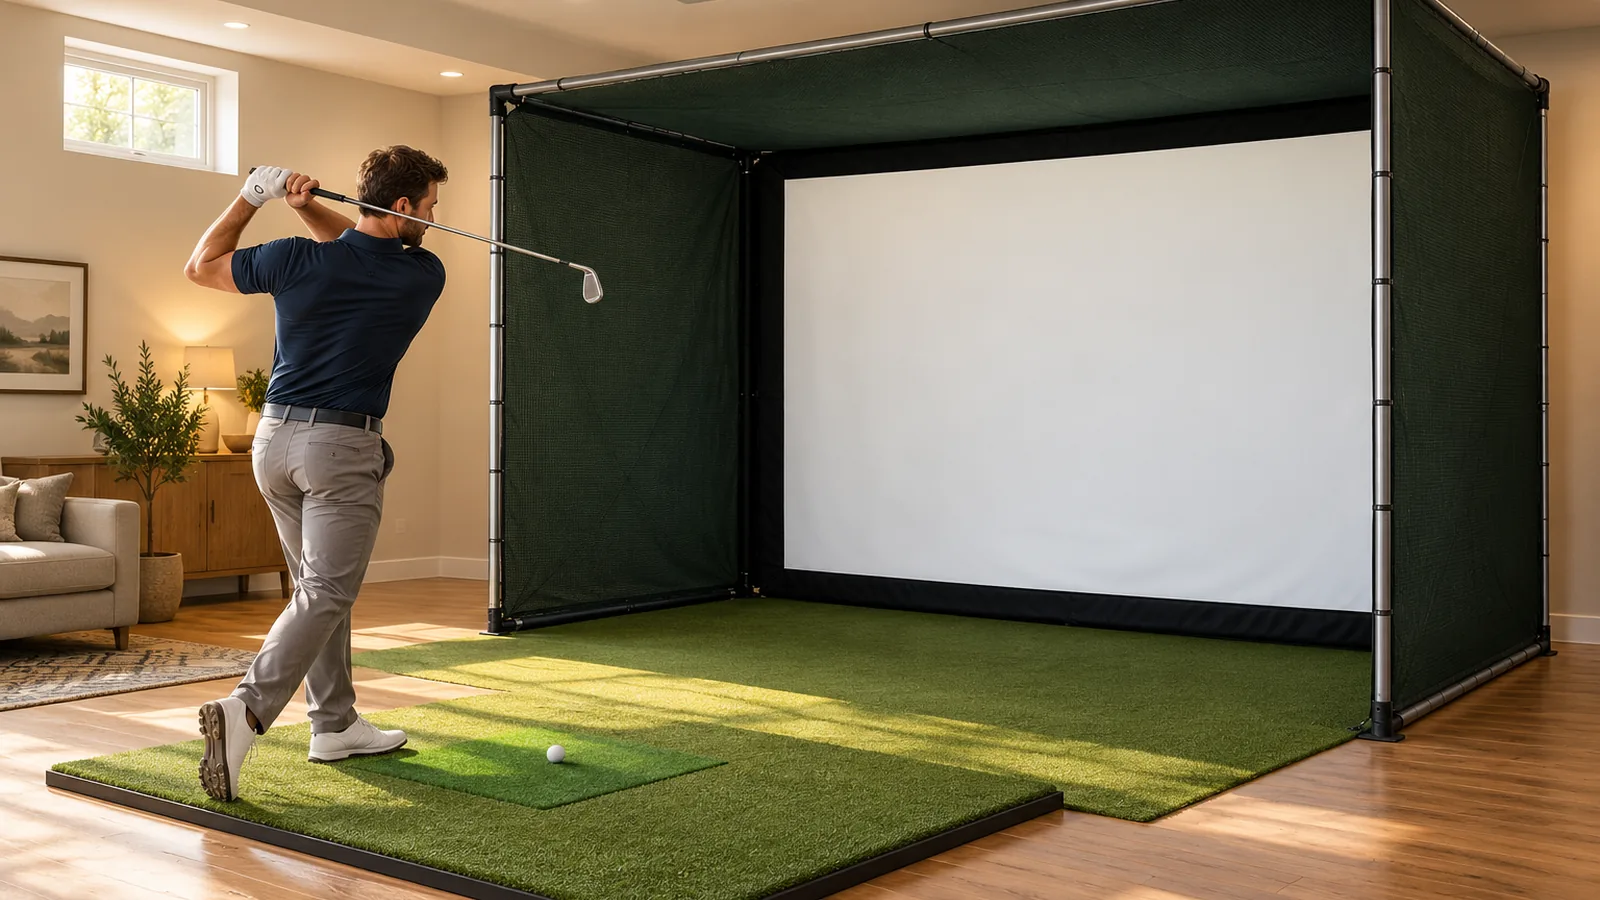
Golf simulator enclosure packages explained in plain terms: each one bundles the impact screen, surround fabric, frame poles, and connectors, and you should leave at least 6 inches of clearance on each side of the frame. Some DIY kits leave out frame pipe, so check the listing line by line and plan to buy 1-inch EMT pipe locally.
What do golf simulator enclosure packages include, and how do you pick one?
Quick answer: A package usually bundles the impact screen, enclosure fabric, frame poles, connectors, padding, and screen fasteners, but the exact list changes by product. Some DIY kits leave out frame pipe, so you may need to buy 1-inch EMT locally. Leave 6 inches of clearance on each side of the frame. For the SIG10, plan on about 11 ft 10 in of room width and a ceiling of 9 ft or more.
- Check the listing line by line for the screen, fabric, poles, connectors, padding, and fasteners.
- Confirm frame pipe is in the box, or budget for 1-inch EMT pipe bought locally.
- Measure clear width, depth, and height at the lowest obstruction, including the garage-door track and opener.
- Budget for a launch monitor separately, since SIG enclosure kits don’t list one.
- Swing your longest club through a full motion in the measured space before you order.
What Comes in a Package?
A golf simulator enclosure package commonly bundles the parts that hold the screen and fabric, but the exact list changes by product. Expect these items:
- Impact screen: SIG enclosure kits list a SIGPRO Premium screen
- Enclosure fabric: the surround that covers the frame
- Frame poles and connectors: the structure that holds the enclosure together
- Protective padding: cushioning for the frame
- Screen fasteners: hardware that attaches the screen to the frame
The SIG10 studio package goes further and lists a screen, enclosure, landing-pad turf, poles, and connectors.
Some DIY kits leave out the frame pipes, so you may need to buy 1-inch EMT pipe locally. Another kit’s manual says buyers without its pipe kit must cut their own pipes to the frame-sheet measurements. Measure before you buy, and confirm the pipe is in the box before you order.
Several items that feel like part of the setup are often sold separately. A projector is optional in the SIG10 studio package, while the SwingBay full package lists one along with a projector mount, HDMI cable, side netting, a mat, and a launch monitor. SIG enclosure kits don’t list a launch monitor, so plan to buy one separately. An EYE MINI CORE package requires a computer, and its enclosure kit contains no simulator electronics.
Assemble the frame first, then fit the cover and screen, because the manual lists that order.
How Do You Choose the Right Size?
Compare the frame’s width, height, and depth with the clear space in your room. The SIG models below are listed at 5 feet deep, so width and height usually decide the fit. The room has to hold the frame plus a full swing, not just the frame itself.
The SIG10’s suggested room width of 11 ft 10 in is 12 inches wider than its 10 ft 10 in frame, which matches the 6-inch gap on each side.
Frame and suggested room sizes for three SIG models:
| Model | Frame width × height | Suggested room width | Suggested ceiling |
|---|---|---|---|
| SIG8 | 8 ft 4 in × 8 ft 4 in | 9 ft 4 in | 9 ft |
| SIG10 | 10 ft 10 in × 8 ft 4 in | 11 ft 10 in | 9 ft or more |
| SIG12 | 12 ft 2 in × 9 ft 4 in | 13 ft 2 in | 10 ft or more |
Choose the SIG8 when your clear width falls between 9 ft 4 in and 11 ft 10 in and the ceiling is at least 9 ft, because the SIG10 needs the wider room. Choose the SIG12 only when you have 13 ft 2 in of clear width and a ceiling of 10 ft or more, since its frame is the largest of the three.
If no standard frame fits your room, the seller also builds custom sizes to your exact dimensions. Before you order, test a full swing with your longest club inside the measured space.
Plan the Installation Around Your Space
Measure the clear space in your garage first, then match it against the frame size and room needs of the model you’re considering.
Measure clear space at the lowest obstruction. Measure width, depth, and height where the space is tightest, including the garage-door track and opener. Nominal room dimensions don’t show what’s actually free.
Compare the garage with the frame and room needs. The SIG10 has a 10 ft 10 in wide frame and needs about 11 ft 10 in of room width, with a ceiling of 9 ft or more. The SIG12 has a 12 ft 2 in wide frame, so plan for about 13 ft 2 in of width and a 10 ft ceiling.
Check SwingBay room needs if you’re considering it. Its enclosure is 10 ft 5 in wide, 8 ft high, and 4 ft 2 in deep. The maker’s guidance is at least 10 × 12 ft with 8 to 9 ft ceilings.
Confirm the depth before you order. One SIG10 studio listing gives the depth as 5 inches, while the enclosure listing gives 5 feet. Ask the seller to confirm before you buy.
Plan the projector and mount position. The projector is optional with the SIG10 studio package, but the SwingBay full package includes one. Decide where it goes before you mount anything.
Gather tools for a built-in kit. Carl’s Place lists levels, ladders, a drill or driver, and a studfinder for its built-in kit.
Test a full swing with your longest club. Swing through a full motion before you finish, to check for contact with walls, the ceiling, or the door track.
Important
Carl’s Place built-in kits need 12 inches of space behind the screen and 6 inches to install the flaps.
Which Package Specs Should You Check?
Check the frame size, room needs, and included parts for each model before you order.
| Spec | Recommended value | Range in sources |
|---|---|---|
| Frame width | 10 ft 10 in | — |
| Frame height | 8 ft 4 in | — |
| Frame depth | 5 ft | 5 in in one listing |
| Screen size (4:3) | 10 ft 1 in × 7 ft 7 in | — |
| Room width needed | 11 ft 10 in | — |
| Ceiling height needed | 9 ft or higher | — |
The depth is the one value the listings disagree on. Use 5 ft enclosure depth as your working number, because it matches the frame listing, but confirm it with the seller before you buy, since a 5 in depth would change whether the enclosure fits your room.
Contents also vary by package. The SIG10 studio package lists the screen, enclosure, turf, poles, and connectors, with the projector and cables optional. Some DIY kits leave out frame pipe, so you’d buy 1-inch electrical metallic tubing (EMT) locally.
Frequently Asked Questions
How long does it take to assemble an enclosure package?
Assembly time varies by package, so plan around the build sequence instead of a fixed number. SIG frames use color-coded poles and connectors, so match the colors as you go, then attach the surround, screen, padding, and side netting.
What tools do I need to assemble an enclosure?
For SIG frames, the maker says a ladder is the only tool you need. Built-in kits ask for more: levels, ladders, a drill or driver, and a studfinder to locate framing before you mount anything. Check the kit’s manual first, since the tools depend on the product.
Do I need an electrician to power a home simulator?
No, the enclosure kit itself has no simulator electronics to power. The power draw comes from the add-ons, since the projector, computer, and launch monitor are often sold separately. Check each device’s power rating against your garage outlet, and hire a licensed electrician if you need a new circuit.
How far should the projector sit from the screen?
Take the distance from the projector’s own throw specs, sized to the 10 ft 1 in × 7 ft 7 in screen the SIG10 uses. Pick the spot before you mount anything, since a package like SwingBay’s includes a projector mount. Then confirm the HDMI cable reaches from that spot to your computer.
How much does a golf simulator enclosure package cost?
Cost depends on what the package includes, so compare the parts lists before you compare totals. A projector and launch monitor are add-ons in some packages, so add them to the total when the package omits them.
Conclusion
If your clear width is between 9 ft 4 in and 11 ft 10 in, pick the SIG8, as long as your ceiling is at least 9 ft. If you have the widest room and a tall ceiling, the SIG12 is the model that fits. Either way, a frame that doesn’t clear your walls won’t fit, so measure before you choose.
Next, sketch your clear space at the lowest obstruction, then ask the seller to confirm the depth and whether frame pipe is in the box. Order only after your longest club clears a full swing in that space.
Sources
- Golf Simulator Enclosures | Made in-House | SIGPRO (shopindoorgolf.com)
- shopindoorgolf.com (shopindoorgolf.com)
- carlofet.com (carlofet.com)
- rainorshinegolf.com (rainorshinegolf.com)
- carlofet.com (carlofet.com)
- shopindoorgolf.com (shopindoorgolf.com)
- hubspot.carlofet.com (hubspot.carlofet.com)
- shop.carlofet.com (shop.carlofet.com)
- support.shopindoorgolf.com (support.shopindoorgolf.com)
- shop.carlofet.com (shop.carlofet.com)
- support.shopindoorgolf.com (support.shopindoorgolf.com)
