How to Assemble a Golf Practice Net
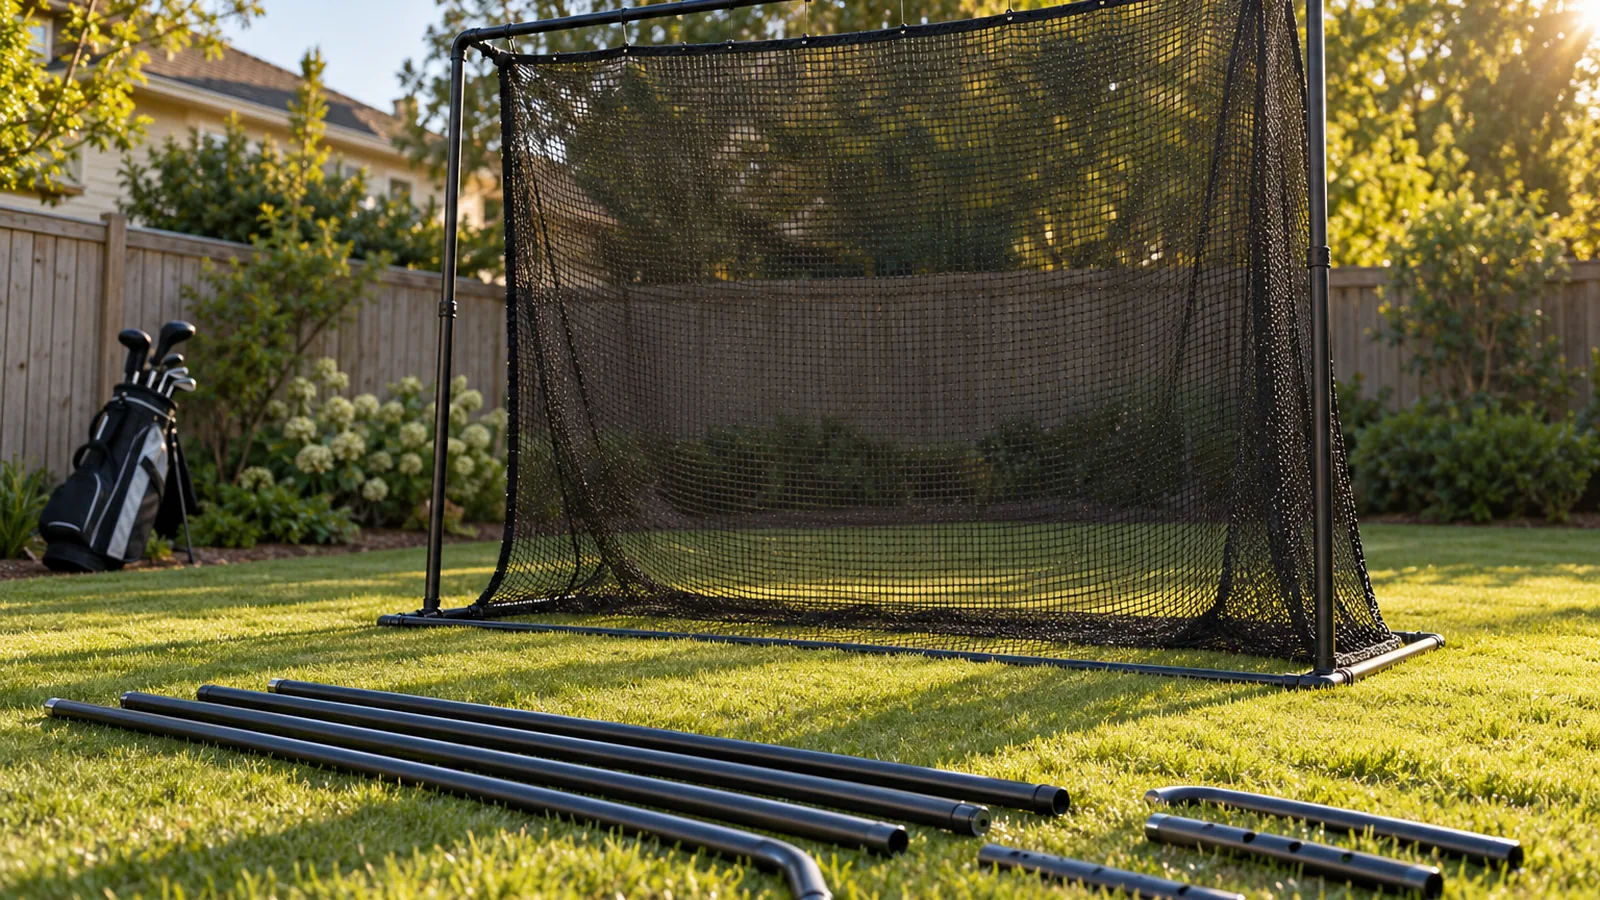
How to assemble a golf practice net means laying out the parts, connecting the base bars and poles in your model’s order, attaching the net, and setting it on flat ground at least 10 ft from structures and vehicles. Skipping the check that each pole sits fully in its pin and sleeve pocket is the mistake to avoid.
How do you assemble a golf practice net?
Quick answer: Build the frame first, then attach the net and its loops, and check each joint before you hit. Plan on two people for a tensioned net. Rukket recommends setting the finished net on flat ground at least 10 ft from structures and vehicles.
- Lay out every part and match it against your model’s parts list.
- Lay the net flat, connect the base bars, and check that each pin locks.
- Join the tent poles, or for an X-frame, connect 2 poles and thread them through the net to form an X.
- Secure each pole end with its peg or pocket, then attach the net sleeves and loops.
- Hang the target on its 4 corner loops, then stake the frame into the ground.
- Confirm each pole sits fully at its pins and sleeve pockets, and that every toggle strap is secured.
How do you assemble a golf practice net?
Most practice nets go up in the same order: frame first, then the net and its attachments.
| Item | Recommended value | Range in sources |
|---|---|---|
| Clearance from structures and vehicles | 10 ft | — |
| Assembly crew | 2 people | One person for the Net Return Home Series V2 |
| Ground stakes in wind | 5 steel stakes | Fiberglass X-frame manuals also list stakes in setup |
| Corner loops for the hanging target | 4 loops | — |
Use two people unless your model’s manual says otherwise. Use steel stakes in windy conditions.
Follow these steps in order:
- Lay out every part and match it against your model’s parts list.
- Lay the net flat and connect the base bars. Check that each pin locks.
- Join the tent poles or fiberglass poles. For an X-frame, connect 2 poles and thread them through the net to form an X.
- Secure each pole end with its peg or pocket, then attach the net sleeves and loops.
- Hang the target on its 4 corner loops.
- Stake the frame into the ground.
- Confirm each pole sits fully at its pins and sleeve pockets, and that every toggle strap is secured.
- Check that the net is taut and all rods are fully connected. Do not use the net if it is warped, damaged, or broken.
- Set the net on a flat surface at least 10 ft from structures and vehicles.
What should you check before using the net?
Before you hit, confirm every frame joint is locked, the net is undamaged, and the setup sits on flat ground at least 10 ft from structures and vehicles.
Check these four areas:
- Frame joints: Confirm each pole sits fully in its pin and sleeve pocket, and that the toggle-and-loop straps are secured.
- Frame and net condition: Look for damage or wear on the frame and net, and confirm the assembly matches your model’s instructions.
- Tension: If the frame sways, make sure every fiberglass rod is fully connected and the net is taut.
- Anchoring: Insert ground stakes firmly for outdoor use, and avoid high winds.
Warning
Don’t use the net if the frame or net is warped, damaged, or broken.
Wind is the main stability risk outdoors. Set the net on stable ground first, then add weight. IZZO recommends 5 steel ground stakes for windy conditions, and sandbags add stability in wind.
Room size depends on the model. SIGPRO specifies a space of 10 ft wide × 8 ft high × 12 ft deep for its 9 ft × 7 ft 7 in × 10 ft golf net. Its ceiling may need to be higher than 8 ft, depending on your swing, so measure your swing height before you set up indoors.
How can you fix common assembly problems?
If your net sways or feels unstable, check the frame first. Confirm that every fiberglass rod is fully connected and that the net is taut. Then check the joints: the frame poles should sit fully at the pins and in the sleeve pockets, and the toggle-and-loop straps should be secured.
Wind and ground contact cause the next set of problems. Insert the ground stakes firmly. If wind is a concern, you can also add sandbags for stability.
Spornia documents a specific fix for a leaning SPG-7 net that takes less than 1 minute. That correction applies only to the SPG-7, so match your model number before you follow the Spornia instructions for it.
Two other common problems have clear fixes:
- Pins don’t lock: Lock the base-bar pins and check that they hold before you join the tent poles or fit the net.
- Net is hard to fit: Delta-Sport recommends 2 people to assemble its tensioned golf net. The Net Return Home Series V2 is advertised for one-person assembly in under 5 minutes, so the difficulty depends on the model.
Warning
Do not use a net that is warped, damaged, or broken.
How do you take the net down and store it?
Remove the ground stakes first, then take the net off the frame before you separate any poles. Undo the steps in the order your model’s instructions specify, because takedown order can differ between models.
Before you set the net up again, check the frame and net for damage or wear, and confirm the assembly is correct. Store the parts only after that check, so a damaged piece doesn’t go back into use.
Frequently Asked Questions
How long does it take to assemble a golf practice net?
Assembly time depends on the model and how many people work on it. Some models are advertised for one-person assembly in under 5 minutes, but a tensioned model is recommended for two people, so bring a second person for that type.
Can you leave a golf practice net outside?
Yes, you can set up a net outdoors if you anchor it properly. Insert ground stakes firmly and avoid high winds, since wind is the main stability risk outdoors. Set the net on stable ground and add sandbags for extra stability in wind.
Is a golf practice net waterproof for outdoor use?
No, don’t assume a net is waterproof just because you use it outdoors. Check the frame and net for damage or wear before each session, and don’t use a warped or broken net.
How do I replace a broken golf practice net pole?
Remove the broken pole from its pins and sleeve pockets, then seat the replacement the same way, checking that it sits fully at each connection. Make sure the new pole matches your model, and don’t use the net until the repair is done. Before you hit, confirm that all rods are fully connected and the net is taut.
How much does a golf practice net usually cost?
Cost depends on the model, so budget for the full setup, not just the net. Add ground stakes, since windy outdoor use calls for 5 steel stakes. Also plan for floor space: one 9 ft by 7 ft 7 in model needs a room 10 ft wide, 8 ft high, and 12 ft deep.
Conclusion
If a second person is free, bring them in, since a tensioned net is easier to fit with two people. If you’re working alone, choose a model whose one-person setup is confirmed in its manual, not just in its advertising. Outdoors, anchor the frame with stakes when the wind picks up.
Your next step is to lay out every part and match it against your model’s parts list before you touch a pole. If a piece is missing or a pin won’t lock, stop and sort it out before you build the frame.
Sources
- images.thdstatic.com (images.thdstatic.com)
- manualslib.com (manualslib.com)
- images.thdstatic.com (images.thdstatic.com)
- manualslib.de (manualslib.de)
- Just a moment… (manualslib.com)
- gunghogolf.com (gunghogolf.com)
- images.thdstatic.com (images.thdstatic.com)
- manuals.plus (manuals.plus)
- thenetreturn.com (thenetreturn.com)
- support.shopindoorgolf.com (support.shopindoorgolf.com)
- spornia.com (spornia.com)